Tuesday, December 4, 2018

My Harry Potter Christmas Tree and Ornament Tutorial, Cheap and Easy Ideas From the Dollar Store.


This year we are celebrating Christmas with a Harry Potter theme.  I have had so much fun thinking of ways to decorate my tree.  I think that I have unleashed my inner witch and I can't seem to stop making things.  Here is what I have done so far.


My Harry Potter Christmas Tree


If you are looking for a really fun Harry Potter game check out my Harry Potter Minute to Win it Game.


I want to thank the amazing Harry Potter community for all of their wonderful ideas, tutorials and printouts.  You guys are absolutely AMAZING!  I will give credit to every blogger who has helped me with these fun ideas.


Hedwig Tree Topper
I will start with my tree topper.  I actually have a cage for Hedwig, but I could not seem to think of any other way to top my tree.  The branches I bought at the 99 cent only store.  They had gold spiders on them, which I cut off and used as ornaments.  The bow is from a large copper colored burlap ribbon bolt that I got on clearance last year at Sam's club.  I knew that it would come in handy!  I noticed that Sam's is carrying the same ribbon this year.

Butterbeer Cups and Cauldrons
The butterbeer cup I got on clearance at Kmart a few years ago.  I painted the ice cubes with a yellow metallic paint.  I brushed on a little gold paint so it wasn't so yellow.  The labels I got off the internet.  I just made them small, cut them out and glued them on the mug.  The cauldrons are from Party City.  At first I put tea lights and yellow tissue paper in them.  After I hung them on the tree I decided to tuck a Christmas light into it so that it would shine all the time.

Owls and the Ford Anglia
The first owl I picked up at Kmart on clearance, but the second owl came from the dollar store.  I actually think that it's cuter. The owl cage is from the 99 cent only store.  The Harry Potter Ford Anglia Car is a free print out that I got off of Shepherd's Pie Blog.


HAVE YOU SEEN THIS WIZARD? 
Ornaments
My favorite decorations so far are the Azkaban Prison signs.   I made one for all 17 members of my family and extended family.
To make them I just googled the sign and saved it in my photos.  Then I took pictures of my family and photoshopped the Azkaban prison sign in front of them.  I moved the Azkaban sign a little bit in each picture.  Just that small thing made them seem more authentic.  I cropped the picture and I placed it over the Sirius Black picture. I laminated the cards so that they look like trading cards.  I made an extra set cards for each person to have one to take home.


Harry Potter Books and Scabbers
Do you see Scabbers hiding in the background? I got him at the  
99 cent store!  That's also where I got all the skeleton mice, plus a few other Halloween decorations that I thought would add a nice touch.

My other favorite ornaments are the miniature Harry Potter books.  I got the covers from AmericanGirlIdeas.com.  She has all 7 books.  I printed and cut out all the book covers.  Then to make the book insides I used cardstock that I cut to fit the book.
Each book took about 2 sheets of white cardstock.  I used a light blue stock on the edges to imitate the hardcover of the book  because it just seems wrong to not make it like there is a real book inside.  Fold just the book binding of the book cover so that you know where to glue the pages.  After you've glued the pages then fold over the book flaps.  I think this the touch that make the book seem real.

 I guess if you were really obsessive compulsive that you could photocopy pages of the book and shrink them down to fit.


Harry Potter Brooms
My next project was to make some brooms.  Using what I had, which was rafia, bamboo, 20 gauge wire, and a glue gun, I created the broom.
I folded the rafia and glued it to the bottom of the bamboo.  I did a double layer of rafia so that it looked nice and full. When I was finished I thought that I should have gone with a third layer, but, oh well.  Once the rafia was all on I soaked it in water, then twisted it.  This is when I cut it on an angle.  To finish it off I took the wire and wrapped it around the top of the rafia three times, leaving about 1/2" on both sides sticking out.  Then I curved the wires down to look like the Harry Potter Broom.


The Snitch
By now I'm getting tired, so I just want to finish up my ornaments.  What Harry Potter tree would be right without a snitch?  I used a piece of gold wire ribbon and painted it with glitter fabric puff paint.  When it dried I folded it over and cut out both wings at the same time so that they would be identical.  By this time I just "winged" it  and cut a few scallop edges and estimated how big to make them.  Luckily they turned out nice.  I glued them on to the ornament with a glue gun.  I ended up using this Snitch for my Harry Potter Minute to Win It Wizarding Games.

I found these plastic wings at the 99 cent store and knew I just had to make another snitch.  
                 I cut the wings shorter using a wire cutter.
I glued the wings on to a small ornament using the E6000 glue. Before I glued the wings on I balance the ornament in the hole of some tape and then used coffee cup lids to prop up the feather.  I waited for one side to dry and then repeated the process for the other side.  The ornament is a little top heavy, but the tree corrects that.  This might be my new favorite!


The Marauder's Map and Trunk
The cute suitcase/trunk was a printout that I got from Little Luxuries Loft.  She has several cute printouts that you can use.  My trunk is darker than hers because I printed it out on brown cardstock.  I love the effect.

The Marauder's Map I got from Harry Potter Paraphernalia .  He did an amazing job.  If you go there check out his large version of the Marauder's Map.  I didn't want a huge map hanging from my tree, and I didn't care if the inside was blank.  I printed mine out on cream colored paper.  I put four maps on a page so that they would be small.

Print on cream color paper, cut out and fold all four maps.  Take a wet cotton ball and rub some brown crayola marker on it and then rub it on the map.  You can practice on a sheet of paper.  I also used a touch of black crayola.  Let dry.  I used double sided sticky tape to tape the map closed at the bottom and middle so that no one could see that it was empty but still looked like it could open.  Then at the top I glue gunned the string.  I finished it with a few drops of melted red crayon to cover the glue stick.  Easy peasy!


Potions

I found these really cool bottles of glitter at the 99 cent store.
I made potion labels for them.  If you would like to use the labels click here for a copy.


You can also print out large labels and use them for the 2 liter soda pop bottles.


Luna Lovegood Glasses and the Quibbler
What Harry Potter Christmas Tree would be complete without Luna Lovegood glasses and the Quibbler?

I googled Luna Lovegood glasses and came up with printouts for both.  The link to the glasses is from LiveAbout.  The Quibbler is from https://print.myscres.com/free/diy-printable-quibbler-26.html
For the lenses I used tissue paper that I glued on with a glue stick.  I drew on the designs with a crayola marker.


Mad Eye Moody Ornament
So by now I just can't seem to stop myself.  I needed a Mad-Eye Moody ornament.  I knew I had seen one, but of course I couldn't find it when I needed it.  I will link to it when I find it. So here's how I did it.
I found the fun glasses at Walmart.  I cut off one of the eye frames with wire cutters and popped out the plastic eyeball.  I glued a blue glass stone in the center of the eye.  I used air-dry clay for the leather strap and the screws.  To make the screws I took a tiny amount of the air-dry clay and made it into a ball.  I flattened the ball and then took a screwdriver and put a line through the midde of the clay circle so that it looked like the top of a screw.  When the clay dried I glued them onto to the frame.

 I think that a cheap leather strap might have been better than the air-dry clay strap because the clay cracked a little after it was dry. I was able to glue it back together though.  I spray painted the screws and the frame with gold spray paint.  Then I popped in the eyeball and glued it all together with a glue gun.  I love how it turned out!


Harry Potter Flying Keys
I really thought that I was done with my tree, but then I remembered the keys with wings.  I bought the skeleton keys at Lowes in the door and key area. 

I printed off the sheet below on pearly white paper (Walmart).
 I carefully cut out the wings on used a glue gun to glue them on the keys.   How easy is that? 

Dobby's Feet
As I was putting up my other Christmas tree I put on the Grinch feet that I made a few years ago.  
That's when I got the idea to make some Dobby feet.  


House Cup Scoreboards
Would you believe that the glass jars and the candy came from the Dollar Tree!  I google the house crests and printed them on paper.  I cut them out and glued them onto the glass.  Then I filled them with the appropriate colored candy.  I had a more popular candy in Gryffindor's and everyone kept eating it so that meant Gryffindor was losing.  We can't have that (even though I am a Hufflepuff) so I put in some cinnamon candy.  No one eats that.

Butterbeer Mugs

I made a Butterbeer mug for everyone in my family.  On one side I put their patronus.  On the other side I put their names.  They turned out super cute and everyone had a special gift to remember our Harry Potter party.  To see how to make one just click here.


Harry Potter Party Decorations
Now that I have finished decorating my Christmas tree, it's time to decorate my house.  Check out all the fun things that I did for my Harry Potter Party by clicking here.


Here are some of my other 
Harry Potter Tutorials
All of my ideas are FREE of charge.
Just click on the picture to see the LINK.

Thank you for visiting Holly's Home!


Wednesday, November 21, 2018

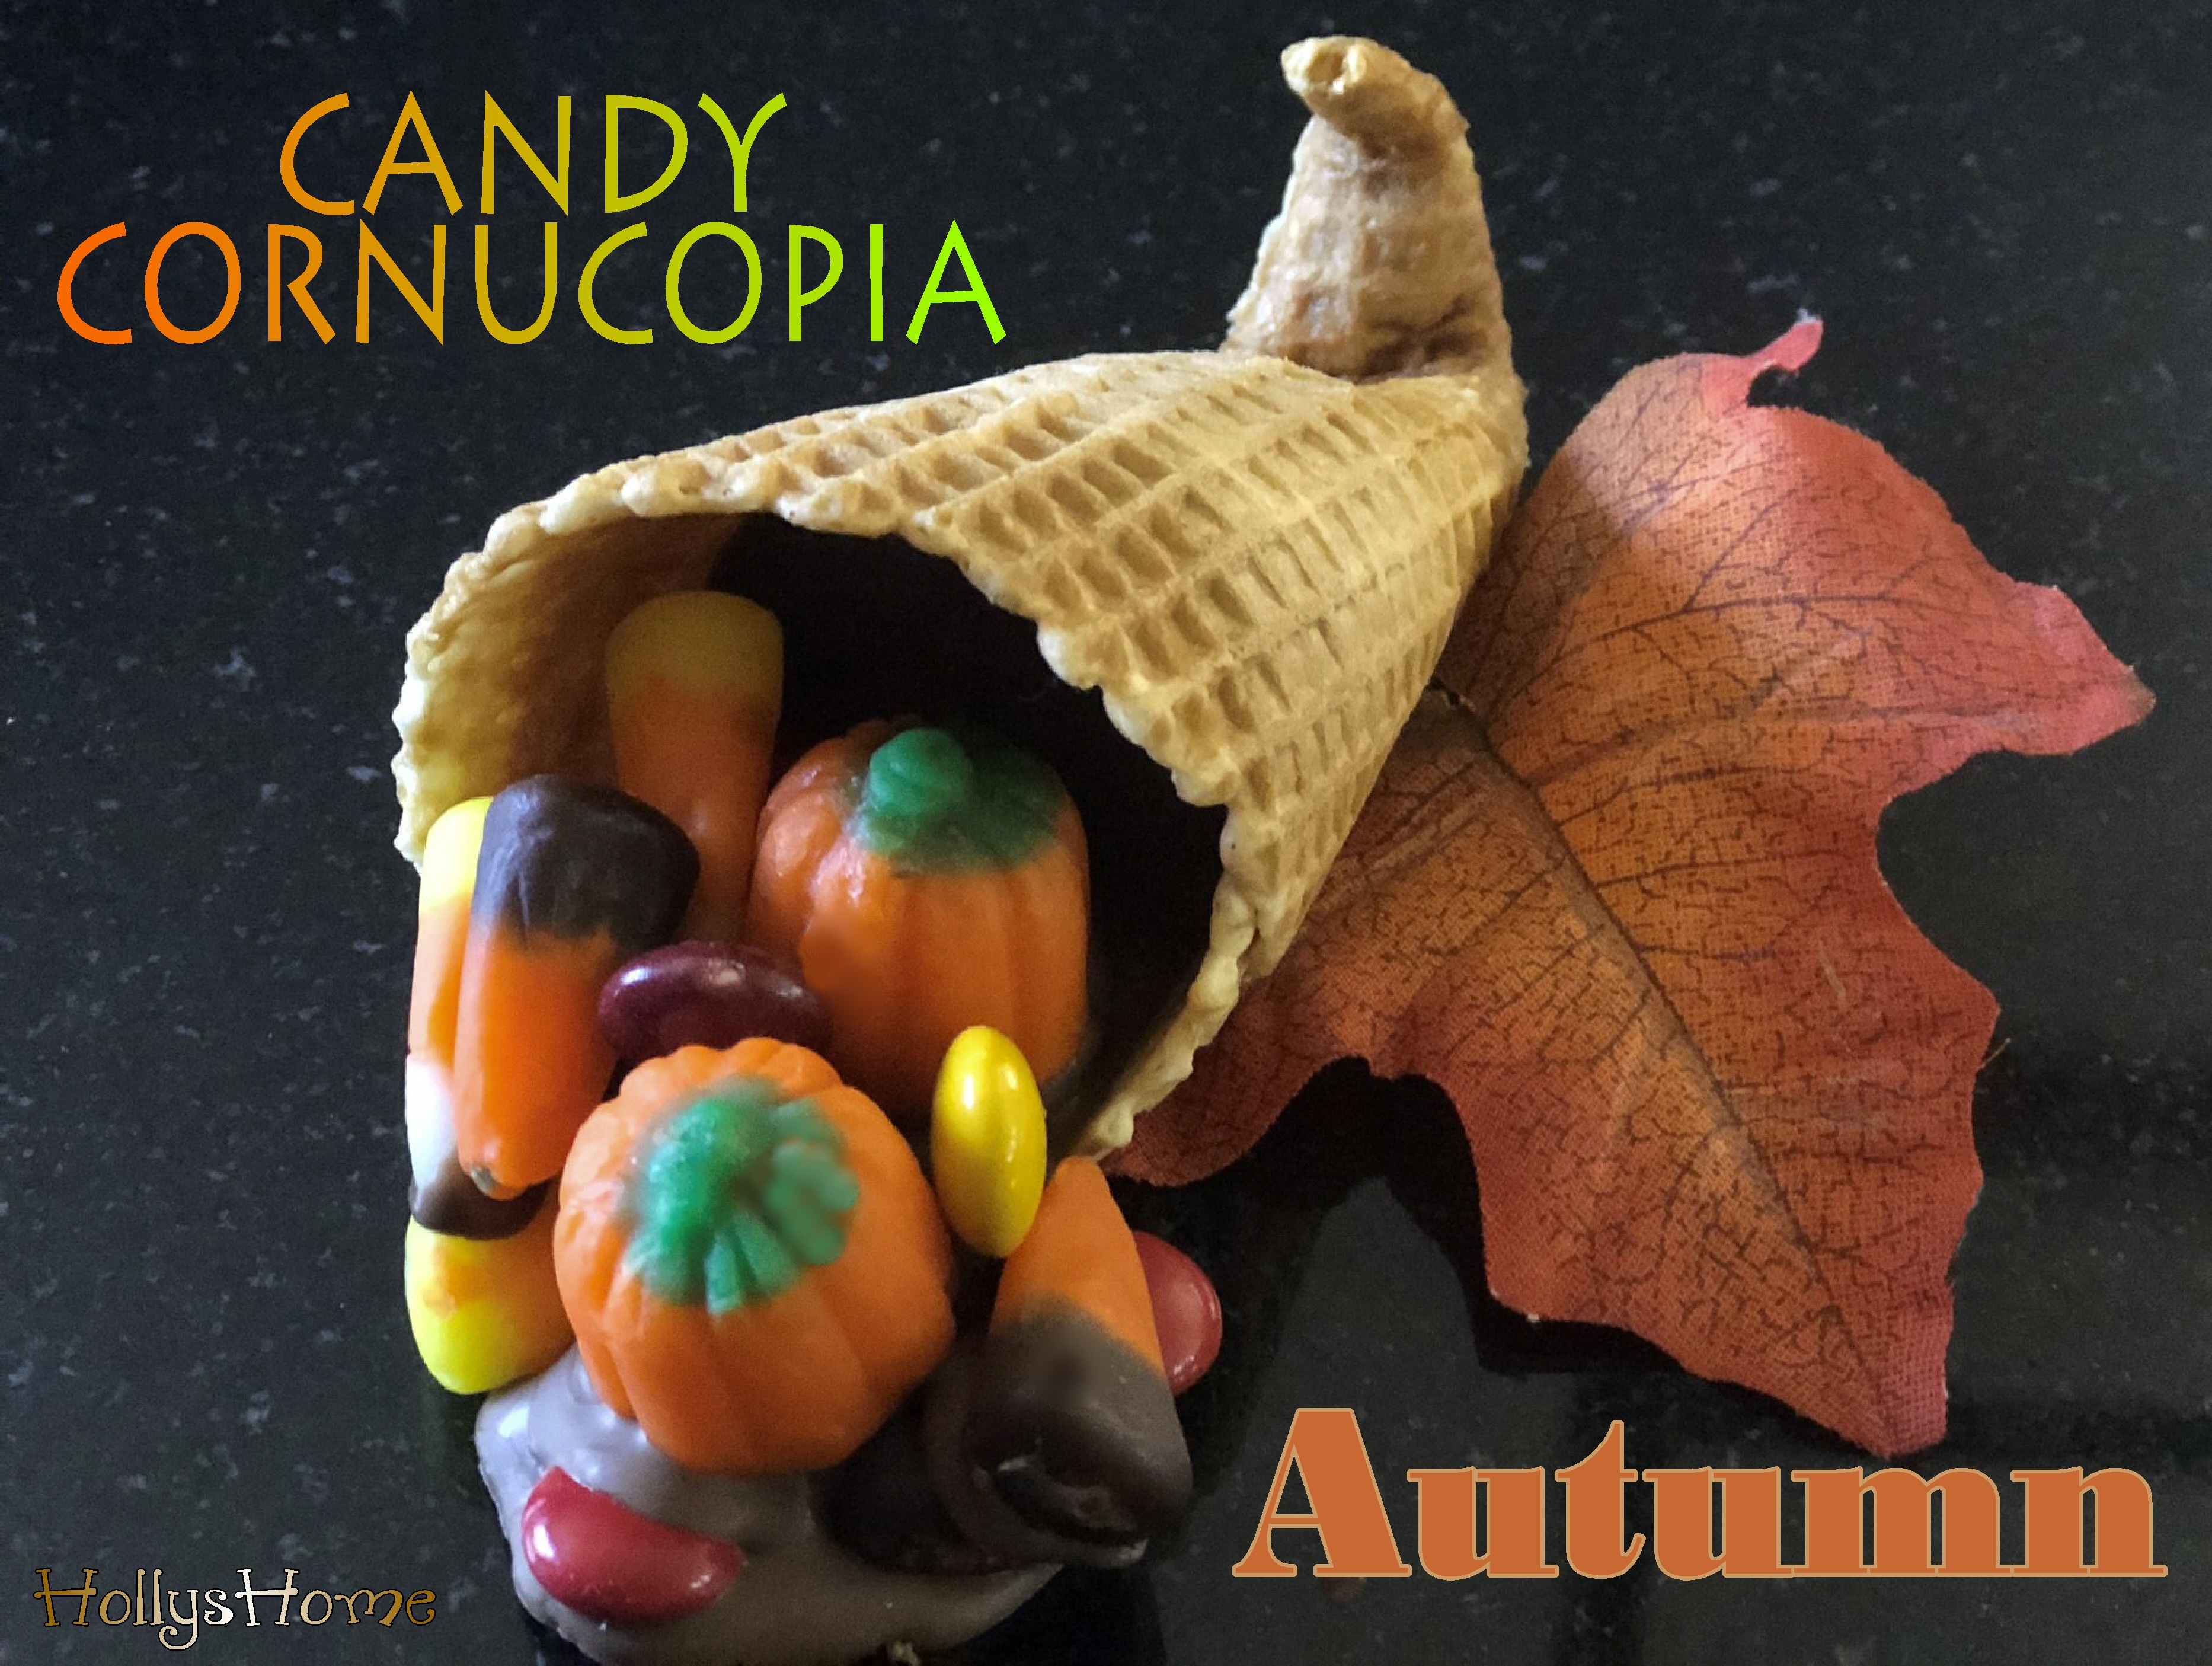
Autumn Candy Cornucopias Made from Ice Cream Cones and Candy. Makes a Perfect Autumn Gift!


I have been seeing some cute Thanksgiving cornucopias made from ice cream cone shells.  I think that they are so cute, but all the ones that I have seen have a plastic bag of candy stuck inside them.  I wanted mine to have the candy flowing out of them.  I also didn't like the flat top to the cone.  I like more a a jagged edged top, but they still had the small top, not the wide top on waffle cones.


Here's how to make them:
The cones that I used had a jagged top like this brand:

The cones I bought I found at the 99 cent only store.  
What a bargain!


Make a Thankful banner for your Thanksgiving!

Here's how to curl the bottom of the cone:


I dipped the cone for 20-30 seconds in 2 inches of water.  I also filled the center of the cone with water.  Then I placed the cone on a plate and put it in the microwave for 20 seconds.
Then I wrapped the pointed end around a small marker that I had cleaned off.  You can also use a pencil.  I let them try for about 30 minutes.  I got impatient, so I moved on the next step while they were still wet.


Filling the Cone:
I filled the cone with m&ms.   I left about 3/4 of an inch at the top.
I put a thin layer of melting chocolate over the m&ms to 
hold them in.
 I placed the cones in a cup.  This helps to hold the curl at the bottom of the cone and to allow the chocolate to cool.
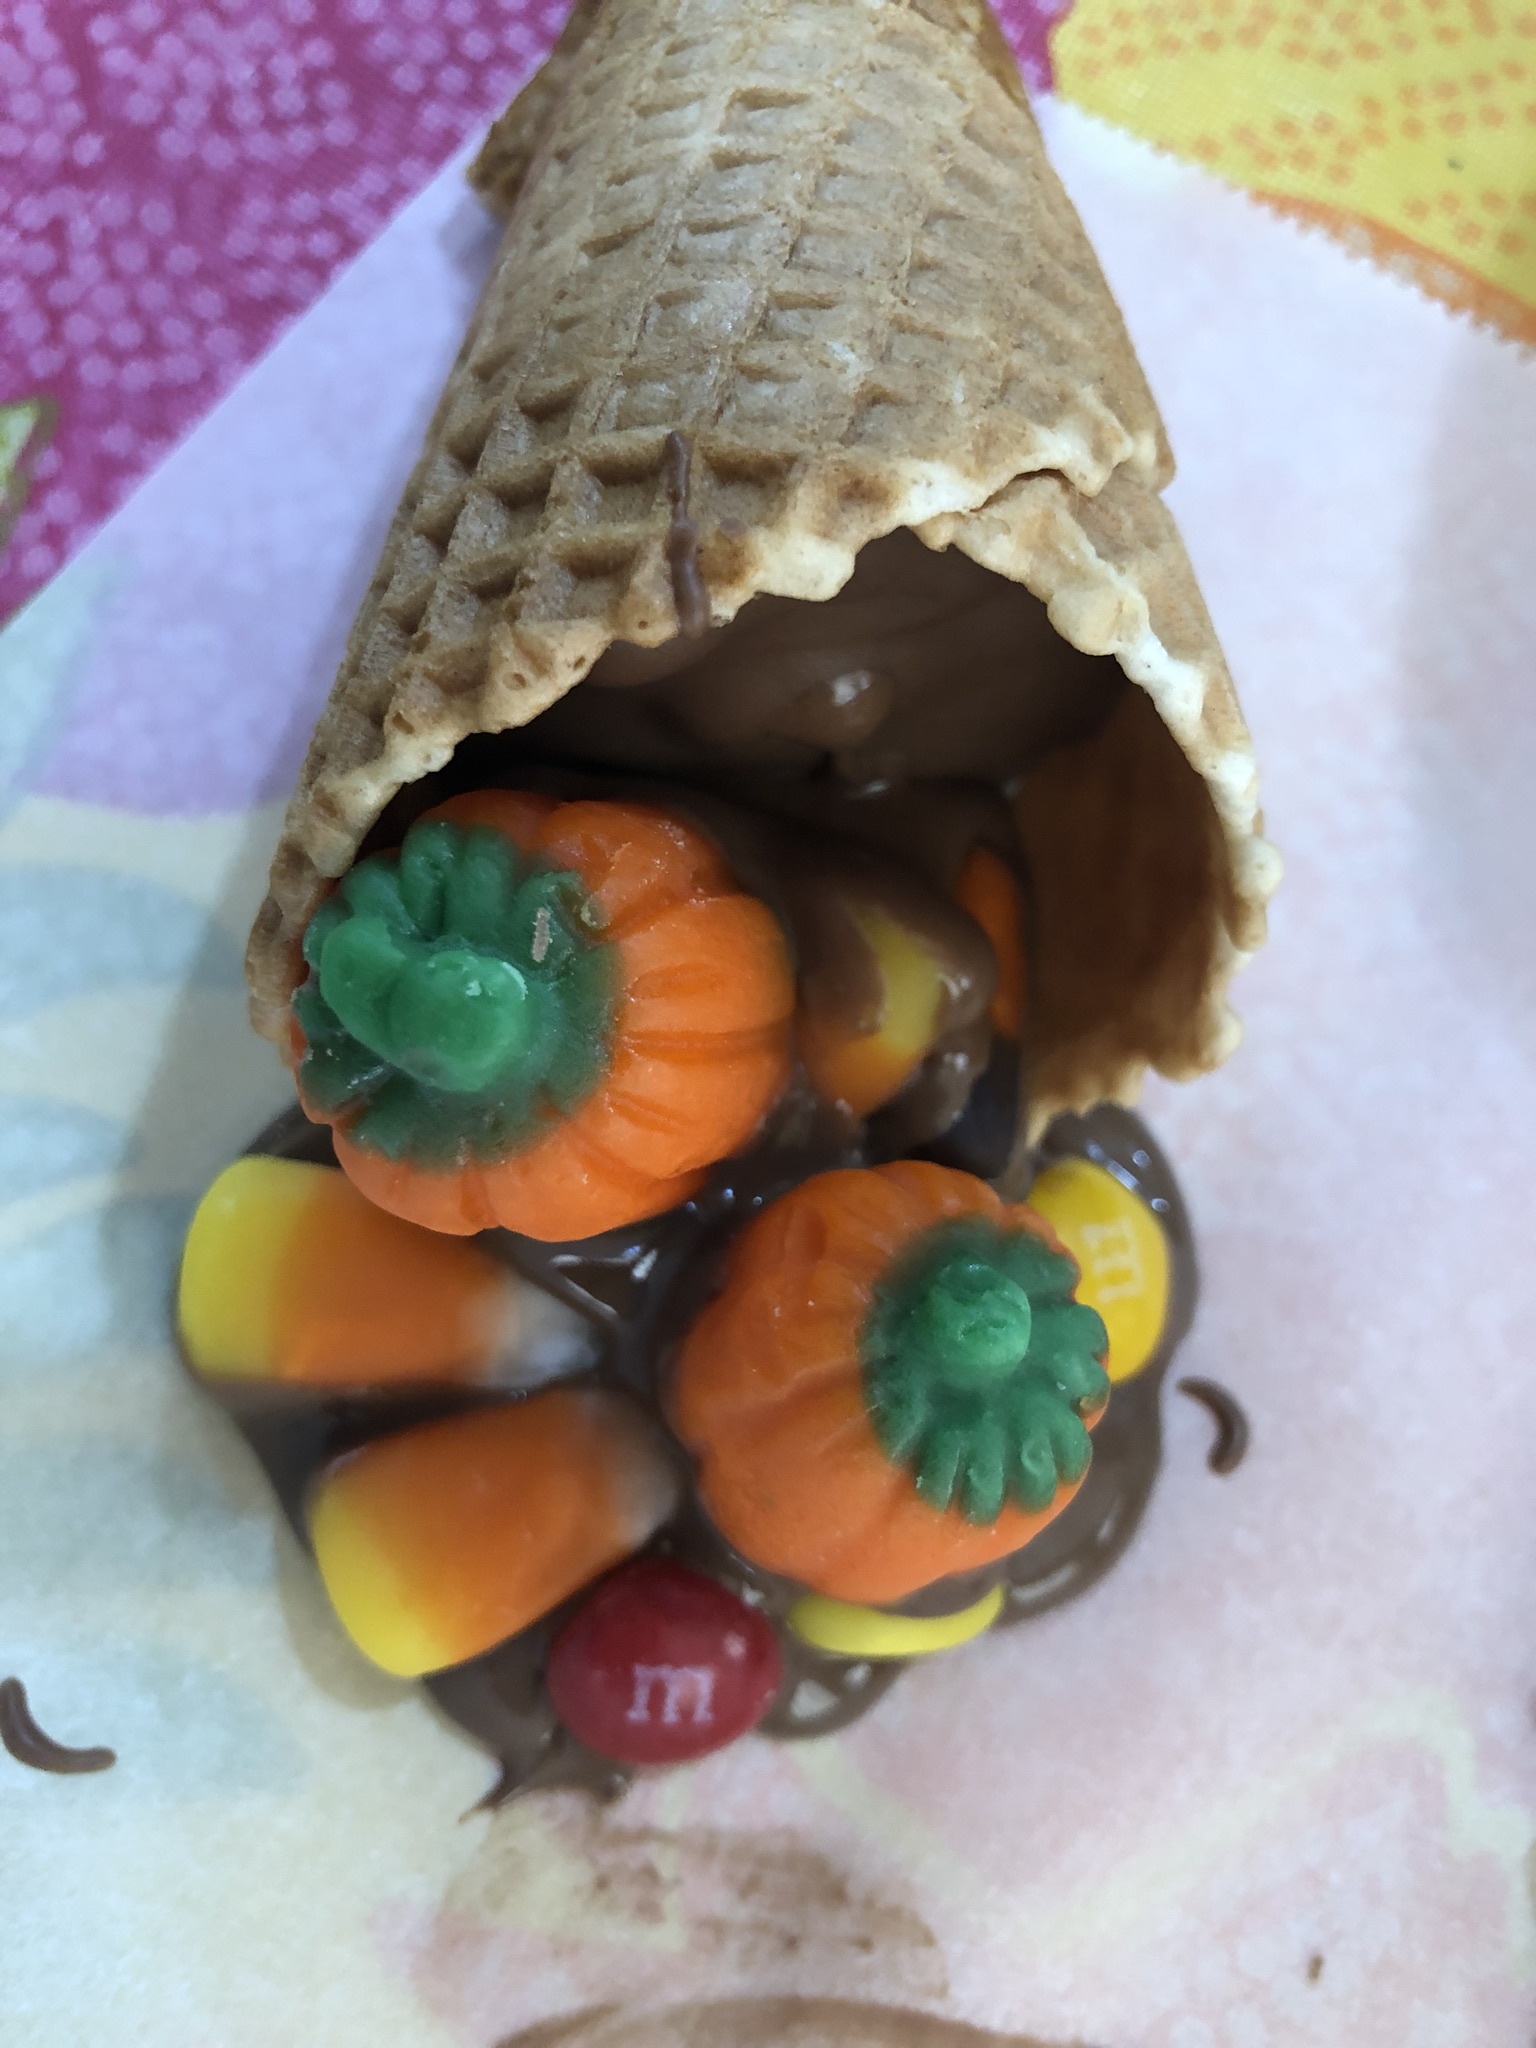
After the chocolate was cooled I laid the cone on a piece of parchment.  I put a small puddle of chocolate inside the cone with the chocolate spilling out of the cone.  


Then I placed the autumn candy mix into the chocolate. 


 Here's a picture of my daughter and niece helping me.

After the first layer of candy was place in the chocolate,  I added another layer of candy on top of it.  I found the easiest way to layer was to dip the candy into the chocolate and place it on top.  I also looked for empty spots and stuck pieces of candy into it.
When I was all finished I added a placecard on it.
I have several different placecards that you can print out. 


If you are looking for more great ideas from HollysHome Check out my Crazy for Candy Corn!  It has more than fifty fun ideas for the Autumn season.


Monday, November 12, 2018

Easy Harry Potter inspired party treats from m&m minis - Weasley's Wizard Wheezes Magic and Mayhem bites

I am getting ready for my Christmas Harry Potter party.  As usual, I get my Christmas candy from the clearance Halloween candy.  In this year's lot of leftover Halloween candy I bought several boxes of the m&m minis.  I knew that I wanted to make something for our Harry Potter Christmas party.  Since the containers are orange, and Weasley's Wizard Wheezes are orange, I thought the two were perfect to use together!  I played on the m&m theme and labeled them magic & mayhem minis.

You can also check out my other project. Harry Potter homemade personalized Butterbeer mugs.


So here is what I came up with.  I made a printout that fits over the plastic m&m containers called magic & mayhem (m&m, get it?)


Here is the printout for this.  Just right click and save it into your pictures, or copy and paste it into your favorite printing program.  Size it to fit a full sheet of paper.


Here's a tip for gluing them on to the container.  I use one of those annoying catalogs that you get in the mail.  I turn the page after putting the glue on each label. That way I can get all the edges and the glue won't get stuck on the next label.   I used a regular glue stick and it worked just fine.


As I was gluing the thought came to me how easy it would be to make a cover for the box.  I would just have to make a full sheet print out and glue it on the box.  Soooooo...
Just for you!  Here it is:


When I glued to the box all I had to do is line up the top sheet with the bottom of the box.  Then it wraps all the way around the top.  Fold it over when it gets to the flap and glue it down.  

It might be just a hair too wide.  You can trim it if you like, or just leave it like I did.  It will get thrown away after the party, so who cares!

And for those of you (like me) who just can't stand to see that the sides don't match the top, here is a printout of just the stripes. 


Now trim the sides.  
Have an awesome party!

I have so many FREE and Fun 
Harry Potter ideas!
Just click on the photo to see the Link.

Thank  you for visiting Holly's Home!


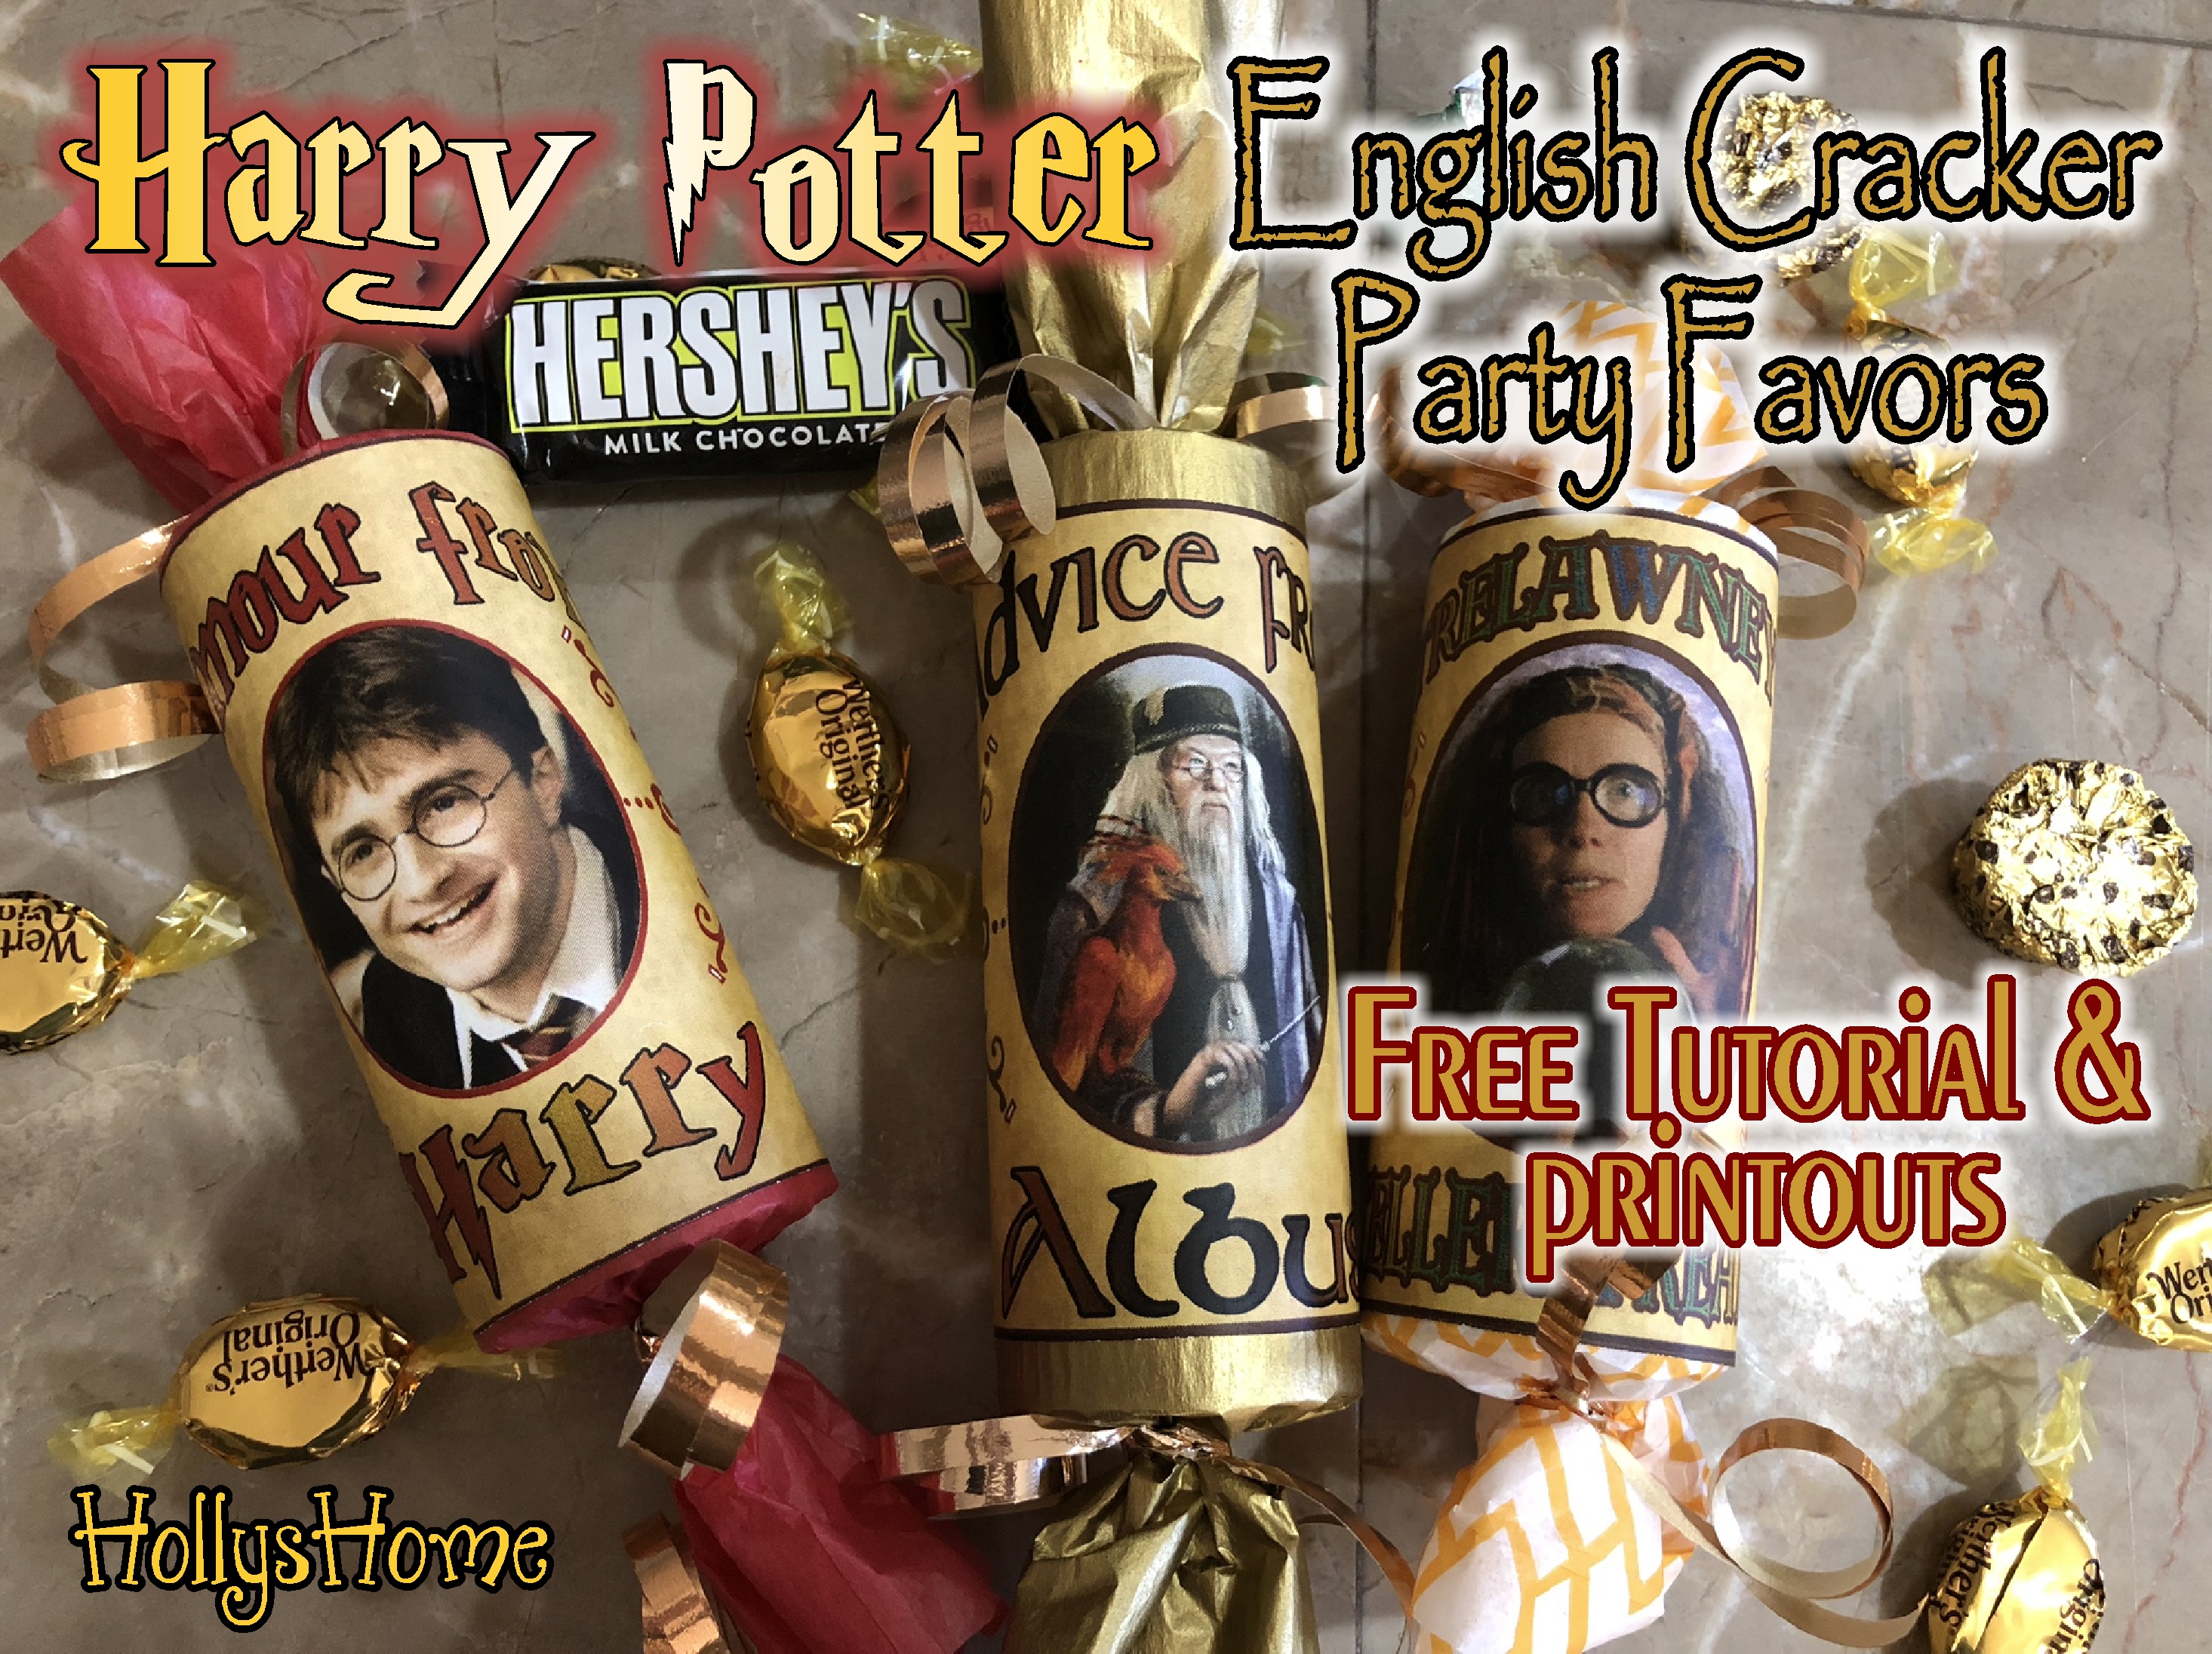
English Party Crackers (Poppers) also make a great party favor.