Wednesday, November 21, 2018

Autumn Candy Cornucopias Made from Ice Cream Cones and Candy. Makes a Perfect Autumn Gift!


I have been seeing some cute Thanksgiving cornucopias made from ice cream cone shells.  I think that they are so cute, but all the ones that I have seen have a plastic bag of candy stuck inside them.  I wanted mine to have the candy flowing out of them.  I also didn't like the flat top to the cone.  I like more a a jagged edged top, but they still had the small top, not the wide top on waffle cones.


Here's how to make them:
The cones that I used had a jagged top like this brand:

The cones I bought I found at the 99 cent only store.  
What a bargain!


Make a Thankful banner for your Thanksgiving!

Here's how to curl the bottom of the cone:


I dipped the cone for 20-30 seconds in 2 inches of water.  I also filled the center of the cone with water.  Then I placed the cone on a plate and put it in the microwave for 20 seconds.
Then I wrapped the pointed end around a small marker that I had cleaned off.  You can also use a pencil.  I let them try for about 30 minutes.  I got impatient, so I moved on the next step while they were still wet.


Filling the Cone:
I filled the cone with m&ms.   I left about 3/4 of an inch at the top.
I put a thin layer of melting chocolate over the m&ms to 
hold them in.
 I placed the cones in a cup.  This helps to hold the curl at the bottom of the cone and to allow the chocolate to cool.
After the chocolate was cooled I laid the cone on a piece of parchment.  I put a small puddle of chocolate inside the cone with the chocolate spilling out of the cone.  


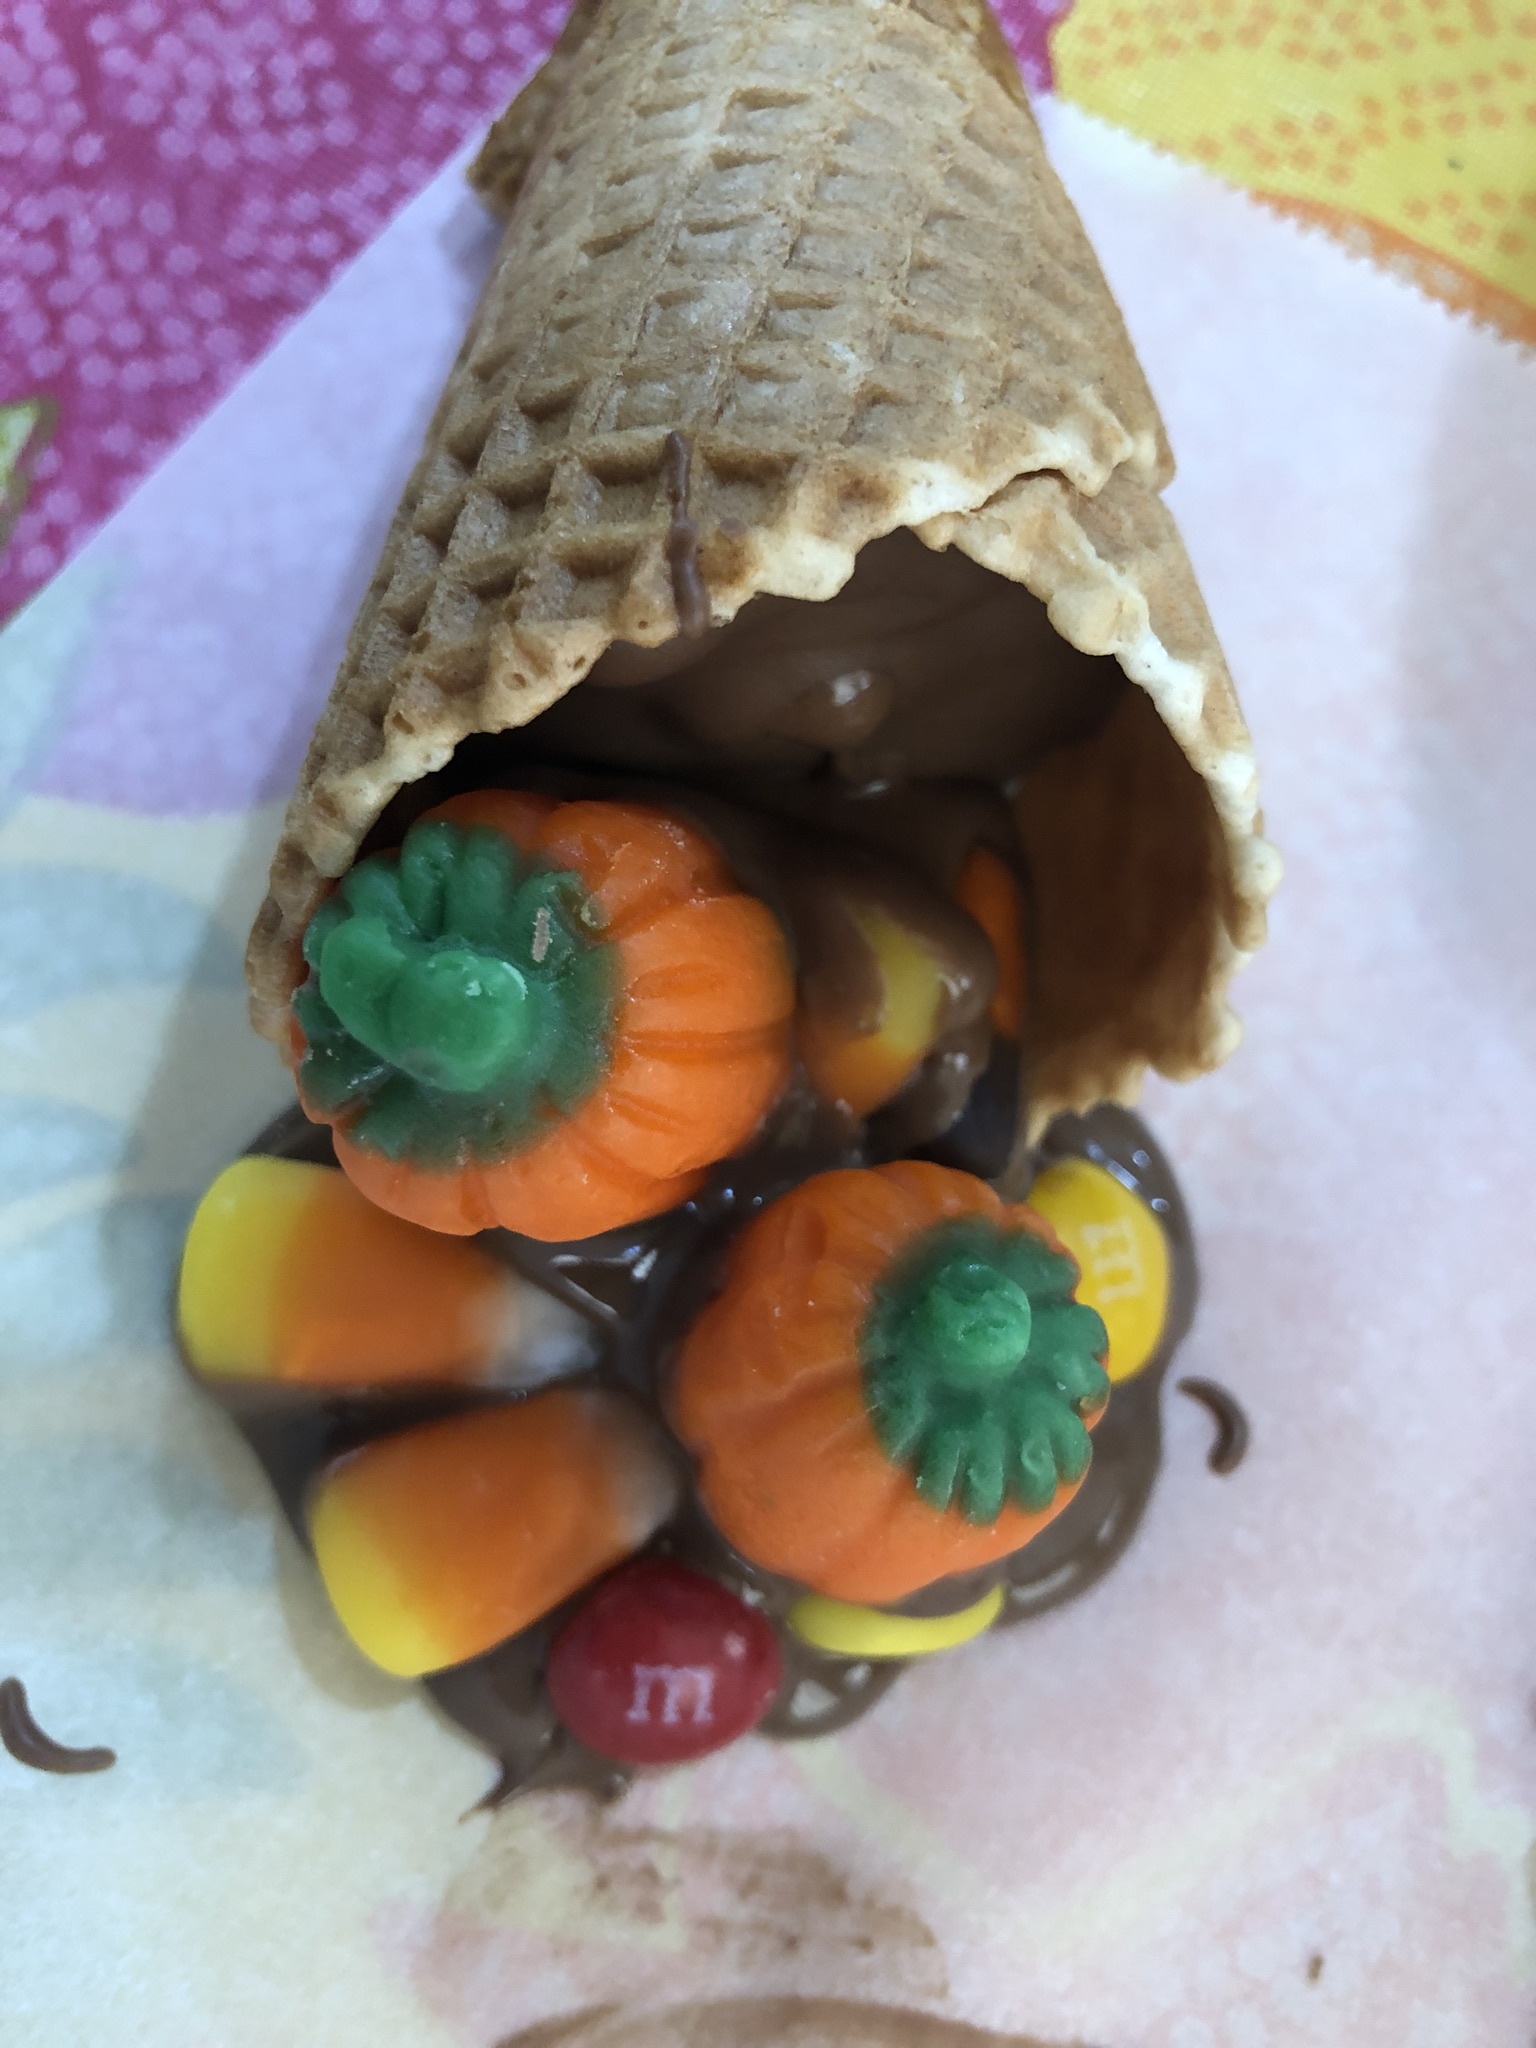
Then I placed the autumn candy mix into the chocolate. 


 Here's a picture of my daughter and niece helping me.

After the first layer of candy was place in the chocolate,  I added another layer of candy on top of it.  I found the easiest way to layer was to dip the candy into the chocolate and place it on top.  I also looked for empty spots and stuck pieces of candy into it.
When I was all finished I added a placecard on it.
I have several different placecards that you can print out. 


If you are looking for more great ideas from HollysHome Check out my Crazy for Candy Corn!  It has more than fifty fun ideas for the Autumn season.


Monday, November 12, 2018

Easy Harry Potter inspired party treats from m&m minis - Weasley's Wizard Wheezes Magic and Mayhem bites

I am getting ready for my Christmas Harry Potter party.  As usual, I get my Christmas candy from the clearance Halloween candy.  In this year's lot of leftover Halloween candy I bought several boxes of the m&m minis.  I knew that I wanted to make something for our Harry Potter Christmas party.  Since the containers are orange, and Weasley's Wizard Wheezes are orange, I thought the two were perfect to use together!  I played on the m&m theme and labeled them magic & mayhem minis.

You can also check out my other project. Harry Potter homemade personalized Butterbeer mugs.


So here is what I came up with.  I made a printout that fits over the plastic m&m containers called magic & mayhem (m&m, get it?)


Here is the printout for this.  Just right click and save it into your pictures, or copy and paste it into your favorite printing program.  Size it to fit a full sheet of paper.


Here's a tip for gluing them on to the container.  I use one of those annoying catalogs that you get in the mail.  I turn the page after putting the glue on each label. That way I can get all the edges and the glue won't get stuck on the next label.   I used a regular glue stick and it worked just fine.


As I was gluing the thought came to me how easy it would be to make a cover for the box.  I would just have to make a full sheet print out and glue it on the box.  Soooooo...
Just for you!  Here it is:


When I glued to the box all I had to do is line up the top sheet with the bottom of the box.  Then it wraps all the way around the top.  Fold it over when it gets to the flap and glue it down.  

It might be just a hair too wide.  You can trim it if you like, or just leave it like I did.  It will get thrown away after the party, so who cares!

And for those of you (like me) who just can't stand to see that the sides don't match the top, here is a printout of just the stripes. 


Now trim the sides.  
Have an awesome party!

I have so many FREE and Fun 
Harry Potter ideas!
Just click on the photo to see the Link.

Thank  you for visiting Holly's Home!


English Party Crackers (Poppers) also make a great party favor.


Thursday, November 8, 2018

Make Your Own Harry Potter Butterbeer Mug. Personalize It With Your Own Name and Patronus. See how to etch glass to make a customized gift.

This year's Family Christmas Party is going to be Harry Potter themed.  I am getting ready early for the big day.  I decided to make a Butterbeer Mug for every member of the family.  The cute mugs I got at the Dollar Tree store.  They were called Irish Coffee Mugs.  I think that they must be seasonal (maybe for St. Patrick's Day?) because I could not find them online.

On one side of the mug I put their name with a lightning bolt attached to one of the letters.  The lightning bolt gave the mug a connection to Harry Potter.

On the other side of the mug is their patronus.  Each person got their patronus on Pottermore. The young children got to chose their favorite animal.

I measured the cup to see what size to make the names and the patronuses.  I think it took a couple of tries before I got a size that felt right.
First of all I printed off everyone's name in Harry Potter font.  Font Space has some great fonts.  The only letter with a lightning bolt was a capital P so I added a lightning bolt to every name and printed it off.  


I had everyone tell me their patronus.  I found the images for those on google images.  I put the pictures on one sheet of paper so that I could use it for games at the party.  Then I printed that off.

I taped the name on the inside of the cup.  Then I wrapped the cup with clear contact paper.  I also taped the patronus on the other side of the cup.


Then I cut out the image using an exacto knife.  If you make any mistakes you can use fingernail polish to fill it in.  I found that the center of letters often came loose.  The polish was also great for small dots or eyes.  Lucky for me I was sick and had to stay in bed.  That gave me a chance to cut out all 17 cups.

A Good friend couldn't understand why I didn't use a cricut to cut out the designs.  I didn't have one at the time, but I have since gotten one and to be honest, I think the exacto knife was easier.  I think it would have been more work trying to weed it all out and getting the transfers in the right spot, etc.  But you certainly could use a vinyl cutter for this project.
Once all the images were cut out on both sides I lined up all of my mugs to put on the etching cream.  
Using a cheap paint brush I dabbed a thick layer of Armour Etch that I got with a 50% off coupon at JoAnn's.  It cost about $10.   I let that side dry for a couple of hours.  Then I turned the mugs over and did the same thing to the other side.
After letting the etching cream sit overnight I rinsed the etching cream off with water.  The etching cream had gotten so dry that it was difficult to remove.  I ended up filling the sink with water to let the mugs soak for a minute or two and then scrubbed them off.  It didn't seem to affect the mug.  I did change water after every few cups so that the etching cream would not ruin the mugs.
After I rinsed them off I held the mugs up to the light to see if I missed any spots.  Once they were all rinsed I put them in the dishwasher.  The etching on the cups is permanent and cannot rinse off so putting them in the dishwasher will not ruin them.

We used these mugs at our Harry Potter dinner.


Later we used them to serve some delicious Hot Butterbeer.  
You need to check out my recipe. 
It's really delicious.


Here are my other Harry Potter ideas.  
All ideas are FREE and easy to do.
Just click on the picture to see the project.


Thank you for visiting Holly's Home!