This Christmas our family celebrated Christmas Harry Potter style. It was so much fun. I want to share my ideas with everyone. I decided that we needed Dobby coming out of our Harry Potter Christmas Tree.
It doesn't need to be Christmas to make Dobby's feet. Dobby could be anywhere. Dobby could be under the bed.
Dobby could be in the dresser drawer.
Dobby could be cleaning the oven.
Dobby could be anywhere.
So lets make some Dobby feet
Items this project:
Crayola's Air-Dry Clay, Terra Cotta
(I purchased at JoAnn's with 50% off coupon)
1/2" dowel 36" long, cut in half
Dobby foot pattern (below)
To print it out copy and paste it into your printing program
or right click and save it into your photos.
Size it to a full sheet of paper.
Start by taking handfuls of clay and shaping them to the foot pattern.
Make balls for the toes. Dobby only has 4 toes, so don't worry about putting 5 toes.
When you have finished all your toes, pinch the tops of the toes to make them pointed and then use a pencil to draw on toenails.
Take a little time to smooth out the clay and clean up the bumps. The top side doesn't have to be perfect because you see more of the bottom of the feet. This is where you turn the feet over. They will be very flat. You will have to add clay to the balls of the feet and to the heel. Smooth and shape as needed. You don't need too make it perfect until the end, so don't worry about making it perfect. You will probably wreck all your work in the next few steps anyway.
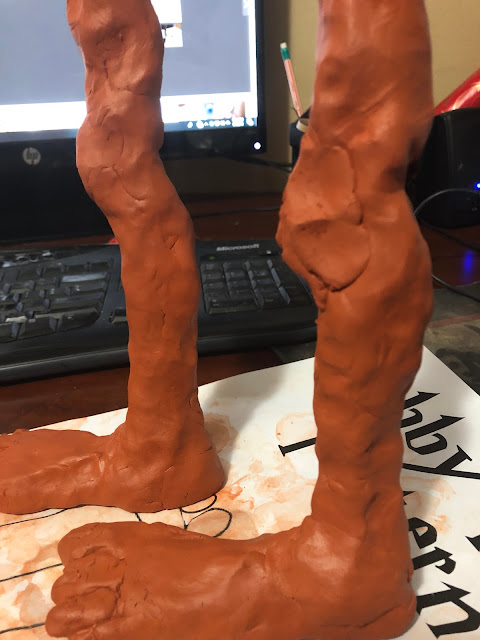
Turn the feet back over. Poke the dowels into the clay, then start covering the dowels with clay.
Once you have the legs covered with clay (about 2/3 of the way up the dowel) then start shaping the leg. You want to have a little extra clay in the back of the calf and extra clay in the knee. Indent the clay behind the knee and build up the clay in the front of the knee. You will also want to make the ankle thinner.
Now is the time to do your final shaping. With your thumb just keep rubbing out any imperfections and reshaping areas that need some work. When you feel like you are done you can use a little water to rub over the project to smooth it out. This is a very messy procedure and the terra cotta color can get on everything so be careful. Use the water sparingly.
I checked on mine several times while they were drying to see if there were areas that needed some touch up. I also rotated them several times until they were dry.
After the feet had dried for 24 hours I attached Dobby's clothes. I ripped on old sheet to fit around the leg. The clay was not dry yet, but it was hard enough that I could work on the pants. I glue gunned the sheet closed instead of sewing. Then I glued the "pants" to the top of the dowel so that the bottom was just above the knee.
Allow the clay to dry for a couple of days. When they are dry have some fun with them. If they are darker then you like, paint some lighter color on them. You could do some shading, or make the feet dirty. Have some fun with them. I would love to see yours when you are done!
Here are my other Harry Potter Projects.
Click on the picture to take you to the project.


No comments:
Post a Comment