

Here is an easy way to make a treat bag that can be used for ANY occasion.
Here's how to do it:
First print out your picture in the middle of the page of paper. You can use whatever color paper that you think would look the best for your graphic.

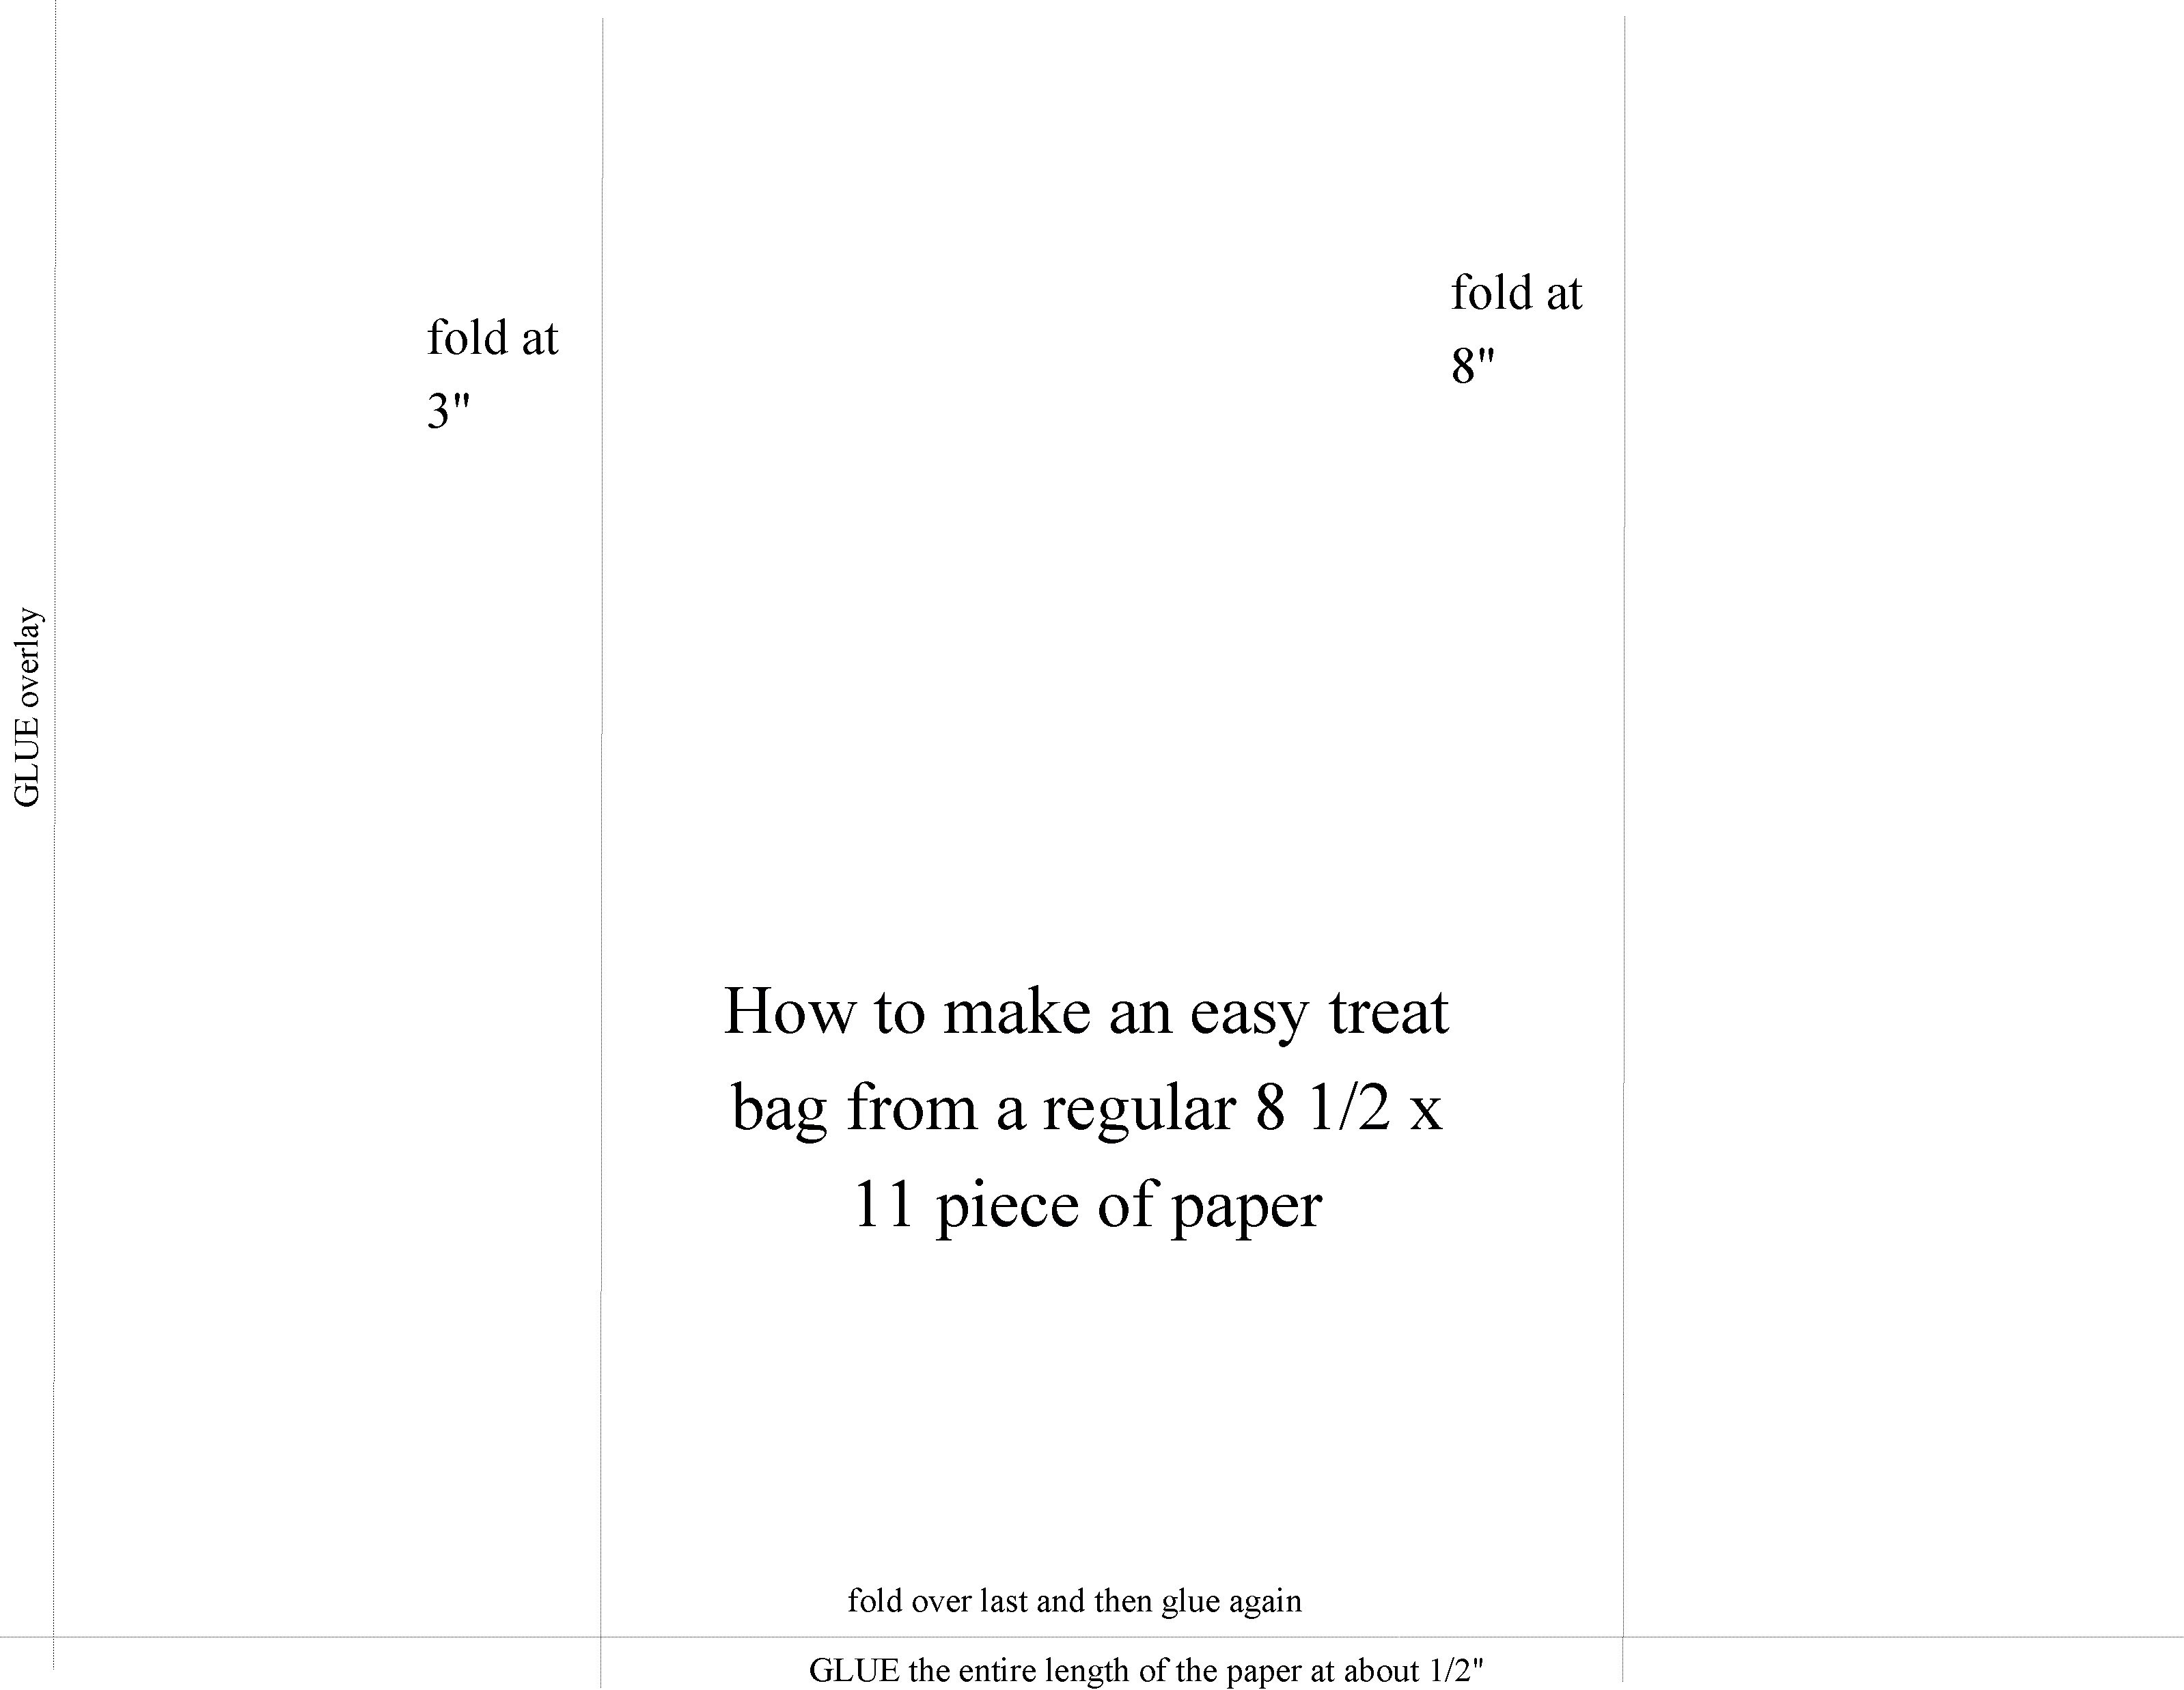
3. Fold the paper at 3" and then again at 8".
4. Put a line of glue where the two papers overlap on the back seam and put another line of glue across the bottom of the bag.
5. Fold over the bottom of the bag about 1/2", making sure that there is enough glue to secure it shut.
6. Use a fancy pair of scissors to cut off the top of the bag. I used pinking shears, but you can use anything. You can even omit this step.

Now fill your bag with treats. I hope you have a fun party. Let me know how yours turned out.n
Here are some Halloween designs for your treat bags.
First click on the picture for a larger version.
Then just right click, save them as a picture.
Size them to a full sheet of paper then print them out.
Use colored paper for an extra pop of color!


You can also fold over the top of the bag and punch two holes.
Then string a ribbon through the holes and tie in a bow
like the Thanksgiving bags below.

Thank you for visiting Holly's Home.
Feel free to leave a comment and let me know how your treat bag turned out!!


No comments:
Post a Comment